How to Install or Remove Fonts on Mac
When working on a MacBook, whether it’s writing documents or engaging in design and video tasks with software like Photoshop or Premiere, fonts are essential for embellishing typography.
While Apple provides default fonts, they may lack the diversity required for design. That’s why many people opt to download and use free fonts compatible with Mac, which can be used for commercial purposes. To install fonts on macOS, the operating system of MacBook, follow the steps below.
How to Install Fonts on macOS
Mac computers use OTF (OpenType) fonts, and you can also install TTF (TrueType) fonts used on Windows.
When distributing fonts, TTF fonts are for Windows, and OTF fonts are for Mac. Many users believe that Mac cannot use TTF fonts, but you can use any font on Mac, and the process to install fonts on Mac is as follows:
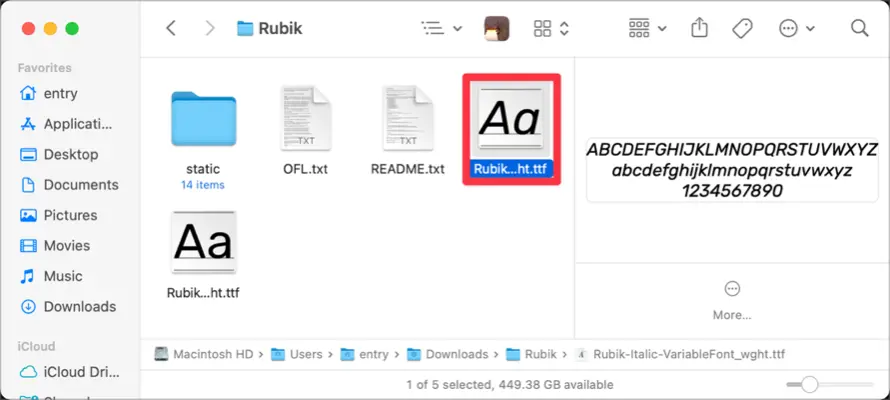
Find the font file in Finder and double-click on it.
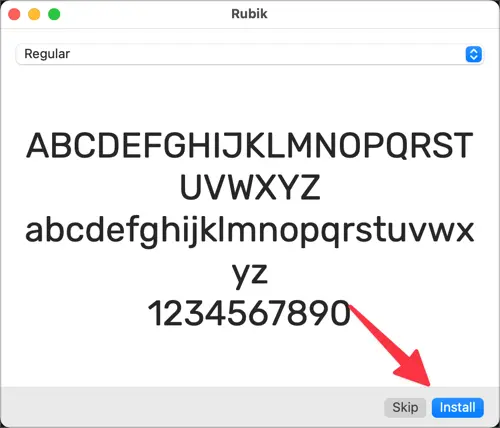
The Font Preview screen in Font Book will open. Click on the Install Font button at the bottom right.
❗️If the same font is already installed, it will show “Installed” in the bottom left of the preview screen.
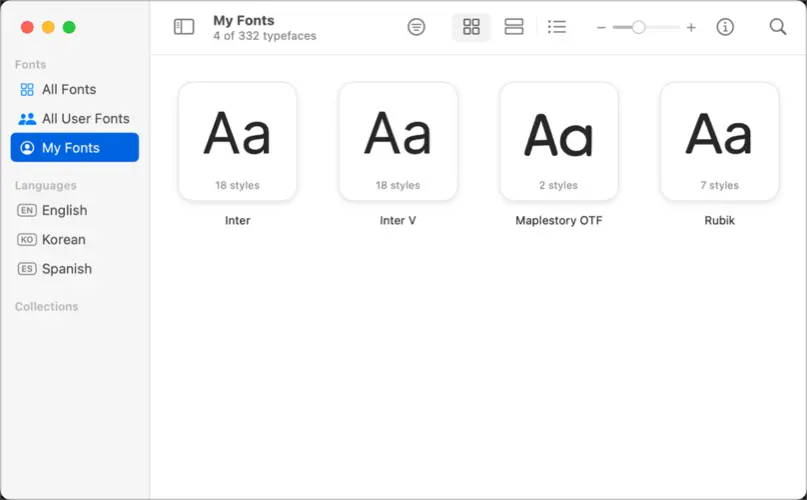
Once the font installation is complete, you can find it in the User section of Font Book.
❗️ The method for installing TTF fonts is the same.
How to install multiple fonts at once
When installing one or two fonts, it’s fine to click the “Install Font” button in the Font Preview screen. However, if you want to install multiple fonts at once, it can be inconvenient to repeat the same process for each font.
To install multiple fonts at once, you can use the Font Book application. Here’s how.
Open Spotlight ( ⌘ + space ) and type “Font Book” to launch the application.

Right-click on “My Fonts” in the left category of Font Book and select the Add fonts to My Fonts menu.

Navigate to the folder where your fonts are located in Finder. Press ⌘ + A to select all the font files, then click the “Open” button.

The selected fonts will be installed and can be found in the User Fonts section.
❕ Alternatively, instead of using the + button in Font Book, you can also install fonts by selecting the font files in Finder and dragging them into the Font Book window.

How to Remove Fonts on macOS
If you no longer want to use a font installed on your MacBook, you can remove it using the Font Book.
- Open Font Book.
- Right-click on the font you want to delete in the User Fonts view.
- Select “Remove [Font Name]” from the font list.
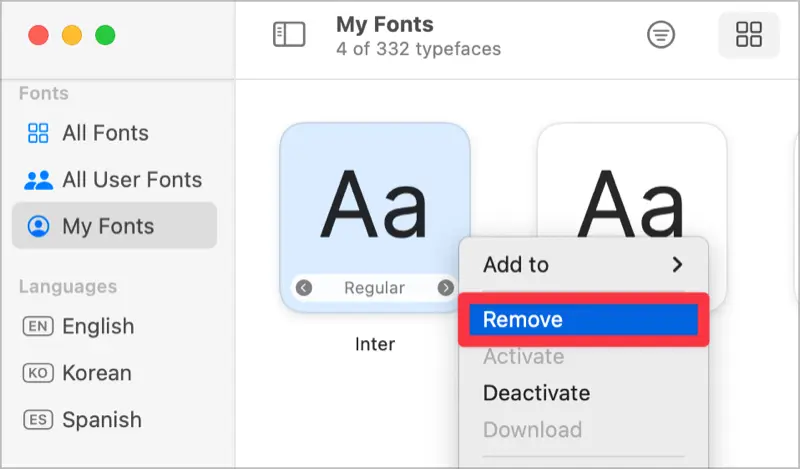
- Do you want to remove the selected fonts? Click the Remove button in the confirmation popup.
- The deleted font file will be moved to the trash and can be restored if needed.
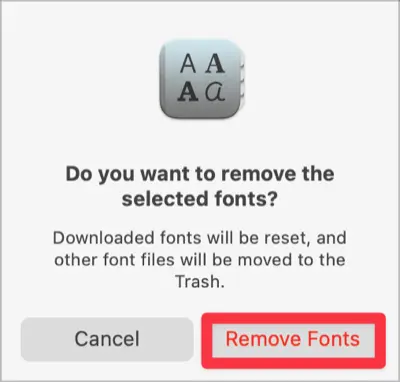
❕To remove multiple fonts at once, hold the Command key while selecting the fonts you want to delete in the Font Book and choose “Remove from Font List”.