How to Show File Extensions on Mac

As a Mac user, you might have come across situations where you needed to view file extensions. By default, macOS hides file extensions to maintain a clean and user-friendly interface.
However, there are instances when it becomes necessary to see file extensions, such as when troubleshooting or working with specific file types. In this article, we will explore the steps to show file extensions on your Mac and provide you with a clear guide to follow.
Change Settings for Displaying File Extensions

Step 1: Open Finder Preferences
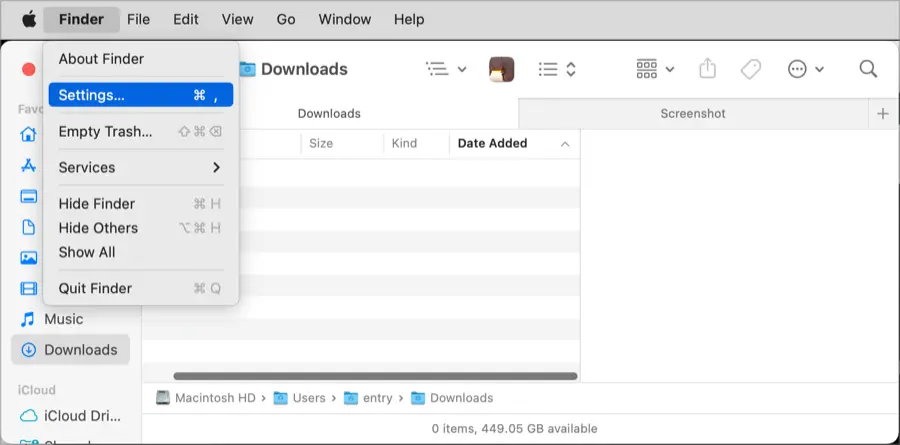
To begin, click on the Finder icon located in your dock to open a Finder window. From the top menu, select Finder and then choose Settings. Alternatively, you can use the shortcut Command + , to directly open the Preferences window.
Step 2: Navigate to the Advanced Tab
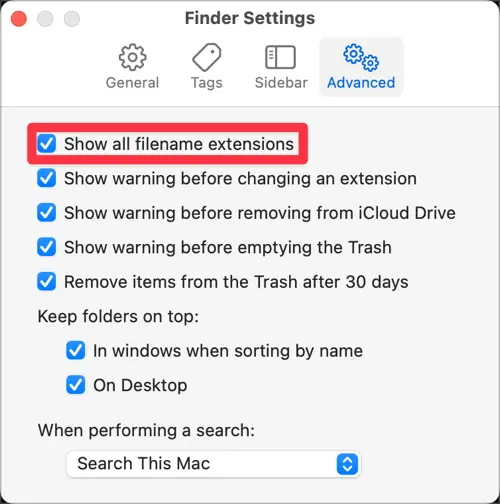
In the Preferences window, navigate to the Advanced tab. Here, you will find various options related to file management and display.

Step 3: Check the Box for “Show all filename extensions”
Under the Advanced tab, locate the section labeled File Extensions. To show file extensions, simply check the box next to “Show all filename extensions”. As soon as you check the box, the file extensions for all files on your Mac will become visible.
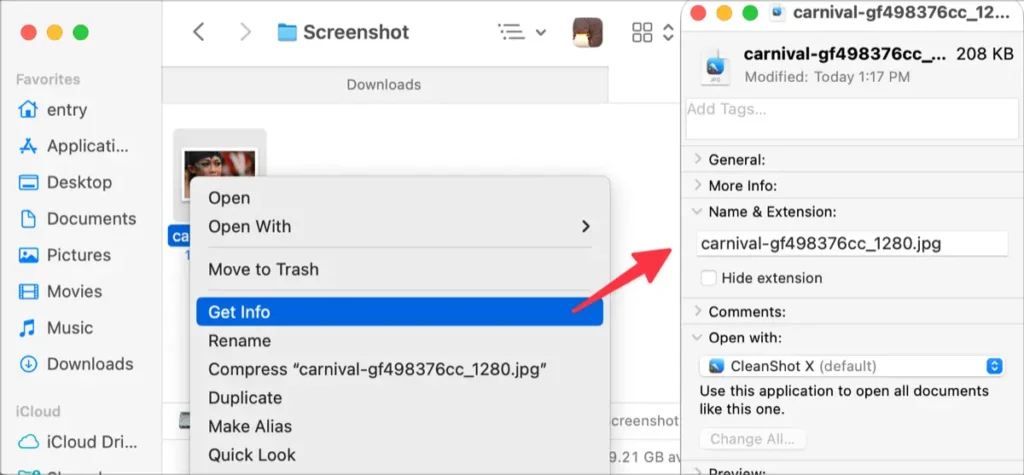
View file extensions without changing settings

Right-click the file and select the [Get Info] menu, or select the file and press the combination key ⌘ + ⌥ + I to check the file extension.
It’s worth noting that while file extensions are now visible, altering or modifying them can have unintended consequences. Exercise caution when working with file extensions and be sure to research the implications before making any changes.
By following these simple steps, you can easily show file extensions on your Mac and have greater control over your files. Whether you need to troubleshoot or work with specific file types, having file extensions visible can be a valuable asset in your macOS workflow.