7 Tips for Navigating Folders in Finder – Mac

We spend a lot of time navigating folders and selecting files in the ‘Finder’ every day. Opening and closing folders, going up and down repeatedly, we end up searching for files and performing various tasks like copying, moving, or executing them. These tasks are the most fundamental operations when using a Mac and serve as the starting point for many workflows.
Recognizing the importance of such actions performed in Finder, Apple has prepared various features to assist in exploring folders.
Shall we take a look at what features are available? It can be an opportunity for beginners to learn various methods and serve as a review for experienced users.
1. Double Click and Keyboard Shortcuts
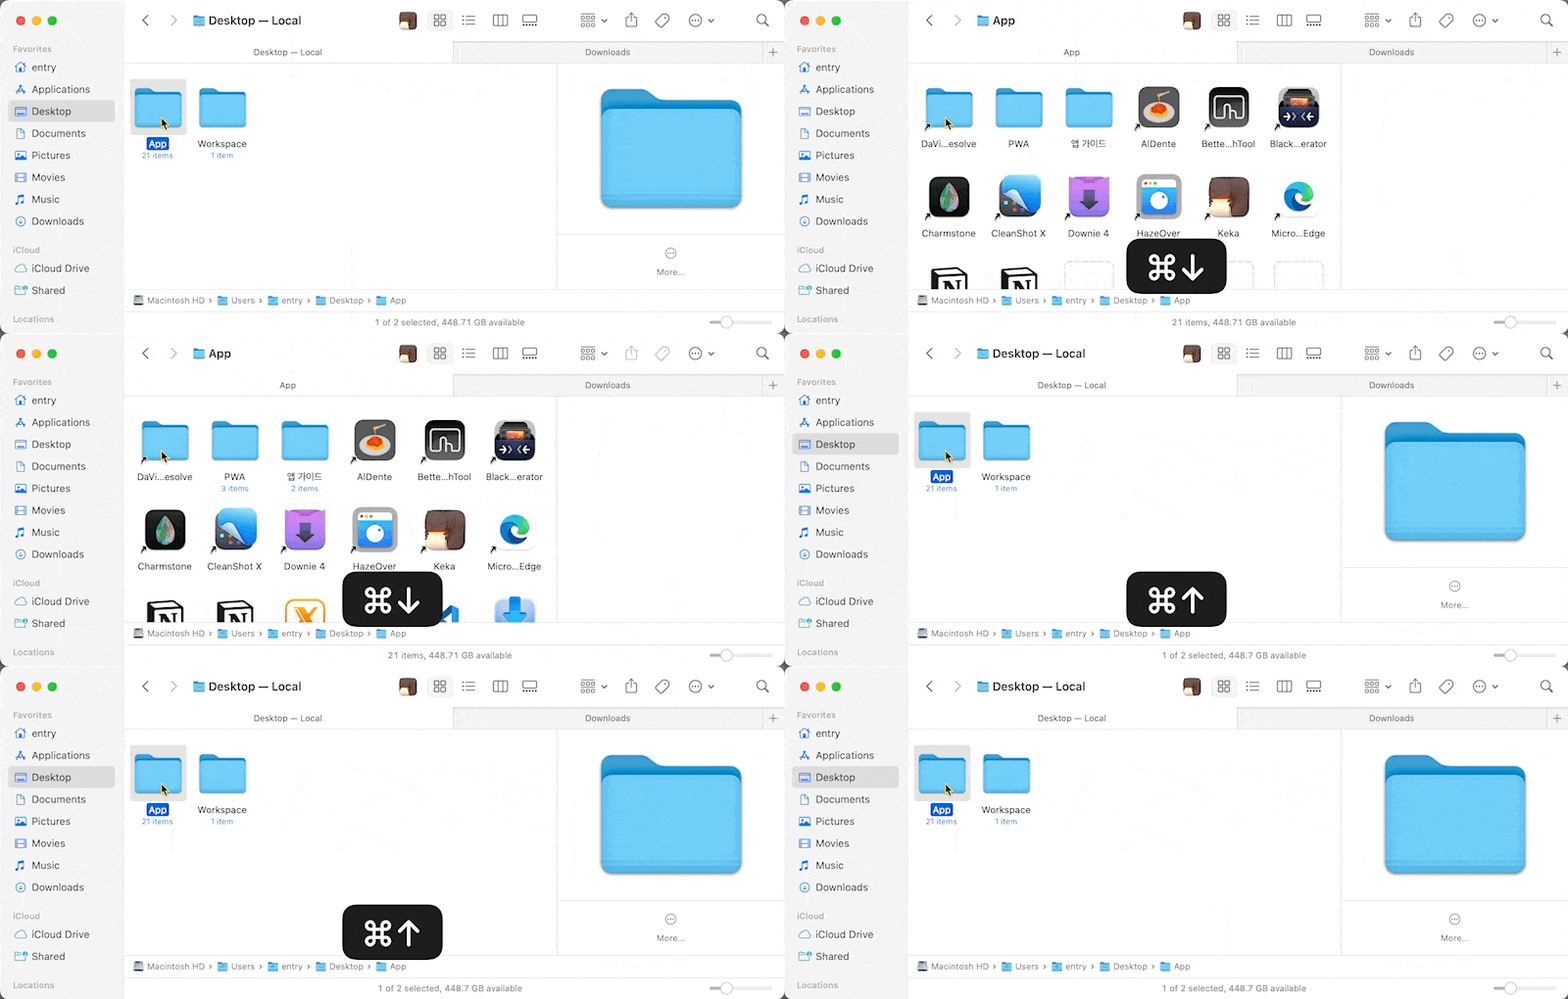
The most basic way to open a folder is through the universally known “double-click.” However, for those who prefer using the keyboard over a mouse or trackpad, keyboard shortcuts can be more convenient.
After selecting a folder using the arrow keys, pressing Command + ↓ (or Command + O) will open the folder, while Command + ↑ will navigate to the parent folder.
2. Button to Navigate to Previously Opened Folder
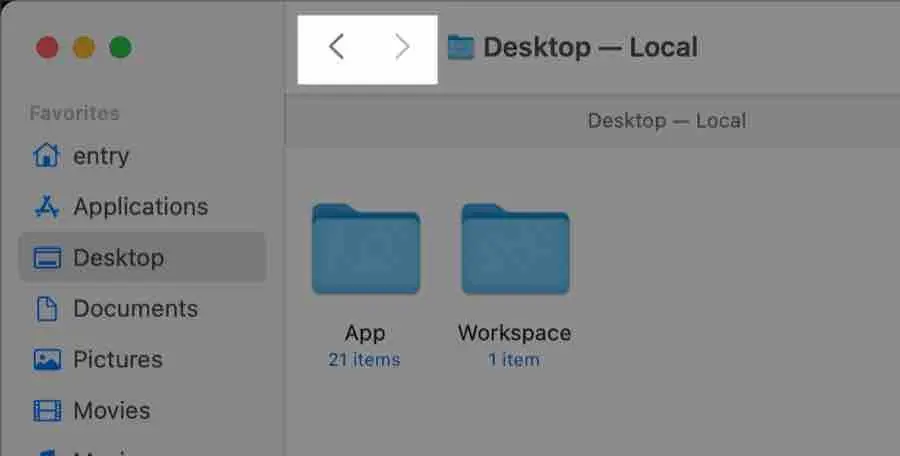
On the left side of the Finder toolbar, you will see a button with < ∙ > symbol. This button is used to open the previously opened folder.
For example, if you navigate from the Downloads folder to the Documents folder and then press the < button, it will take you back to the previously opened Downloads folder, rather than opening the parent folder of Documents, which is the ‘Home’ folder. It functions similar to the previous/next page buttons found in most web browsers.
Here’s a helpful tip: If you press and hold the button, you can see the path of folders you have traversed before reaching the last folder.
3. Using the Title Bar Icon
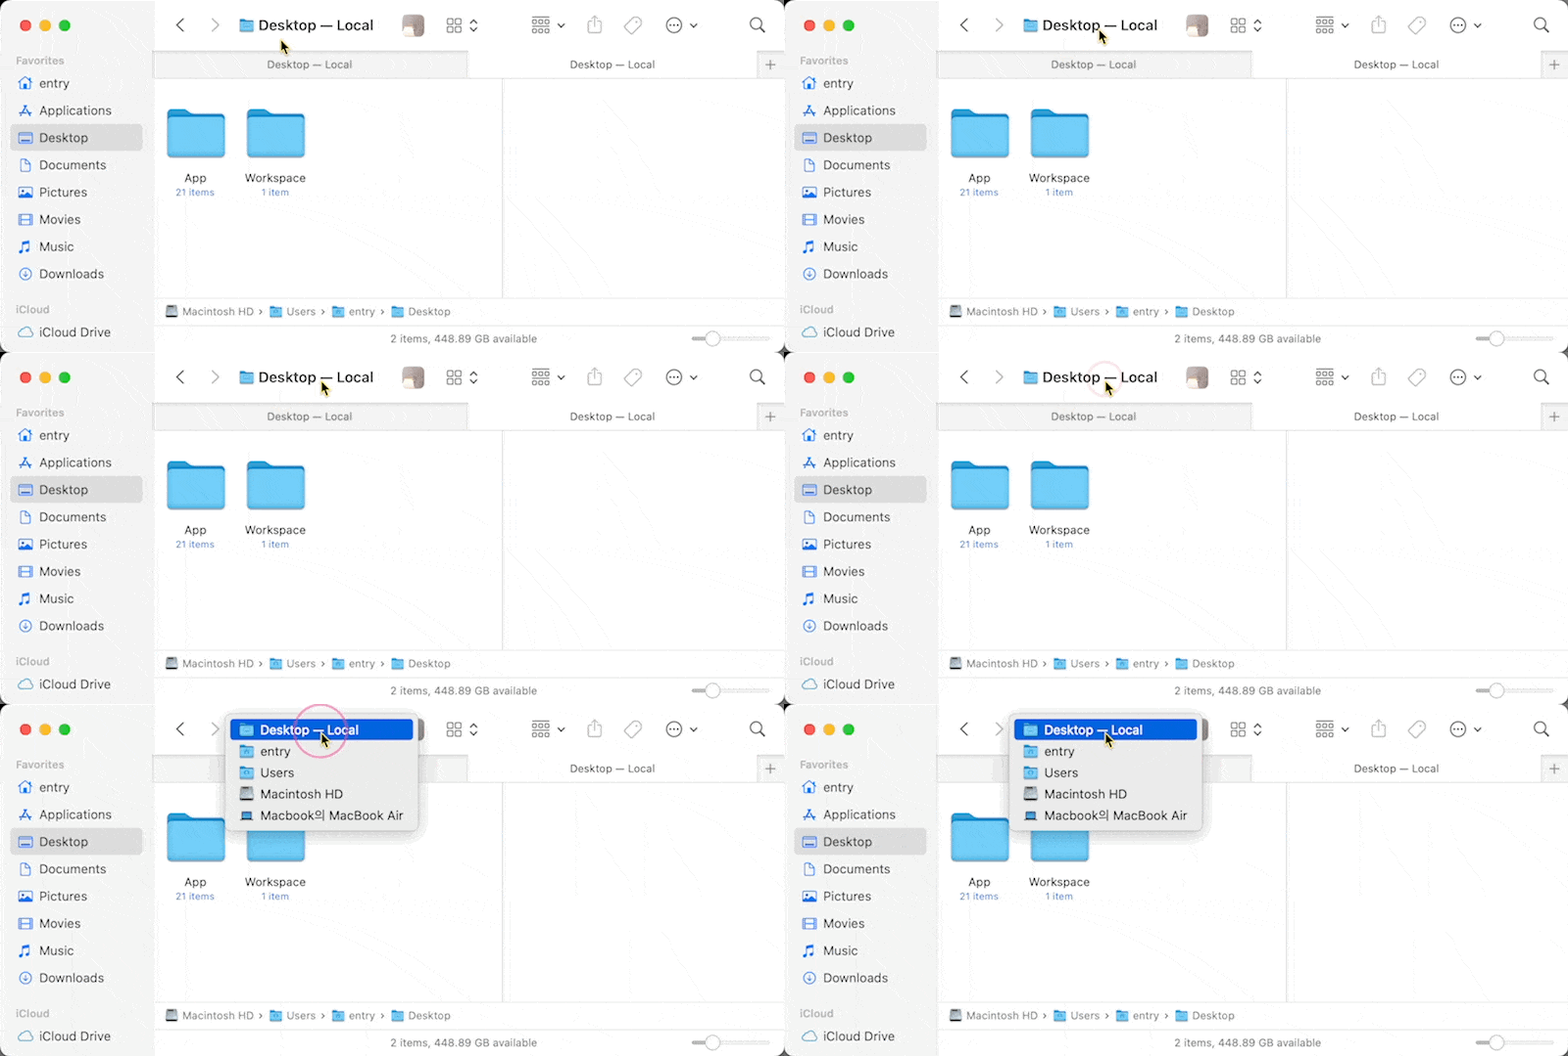
At the top of the Finder, you’ll find the name of the folder you currently have open, along with a ‘proxy’ icon representing that folder.
While holding the command key, click or right-click the proxy icon to reveal a small pop-up window that displays the complete folder structure. Through this pop-up window, you can quickly navigate to any folder that exists between the currently open folder and the top-level folder.
4. Adding Path Button to the Finder Toolbar
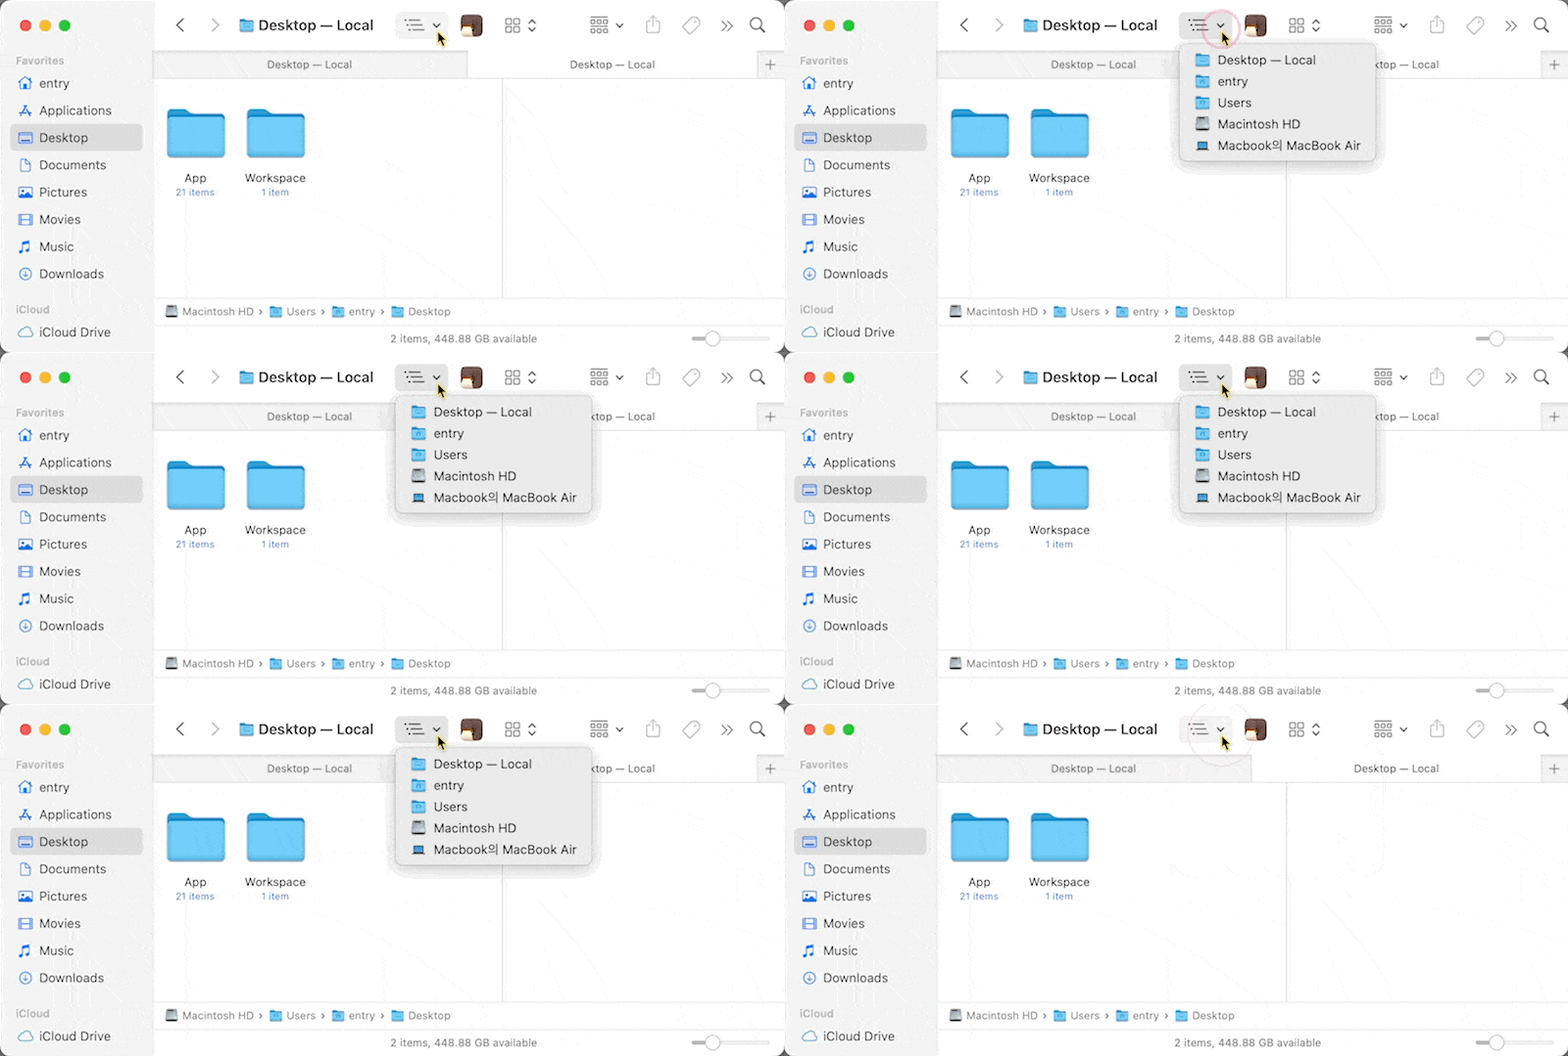
You can also add a button with similar functionality to the proxy icon in the Finder toolbar. Right-click the Finder toolbar, click on “Customize Toolbar,” and drag the “Path” button to add it to the toolbar. Just like the proxy icon, you can click the button to instantly navigate to any folder that exists between the folder and the top-level folder.
5. Opening the Finder Path Bar
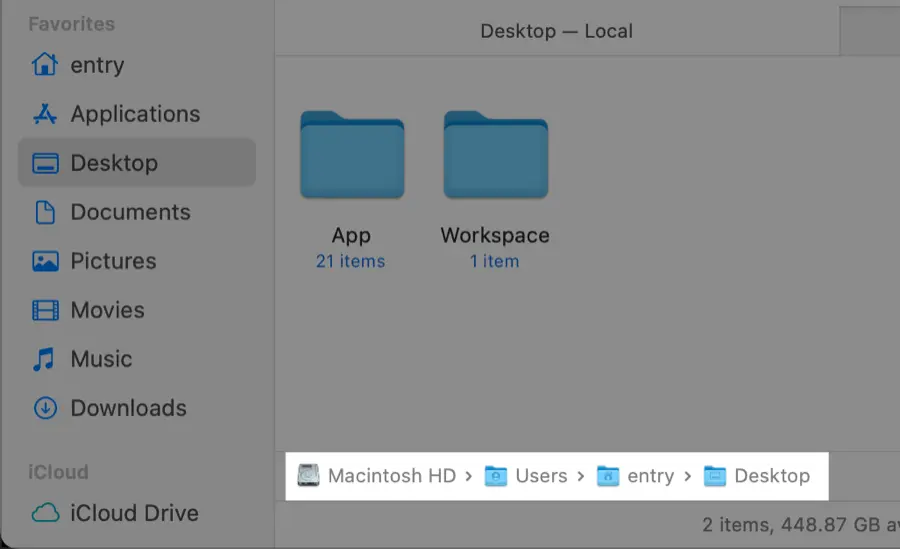
To display the path of the currently open folder in the Finder, you can click on Finder > View > Show Path Bar or press Command + Option + P. The path of the currently open folder will appear below the Finder window.
You can double-click on any folder shown in the path bar to navigate directly to that folder. Holding the Command key while double-clicking will open the folder in a separate tab. Additionally, you can drag files to the parent folder displayed in the path bar to move them there directly.
6. Utilizing Finder’s Column View
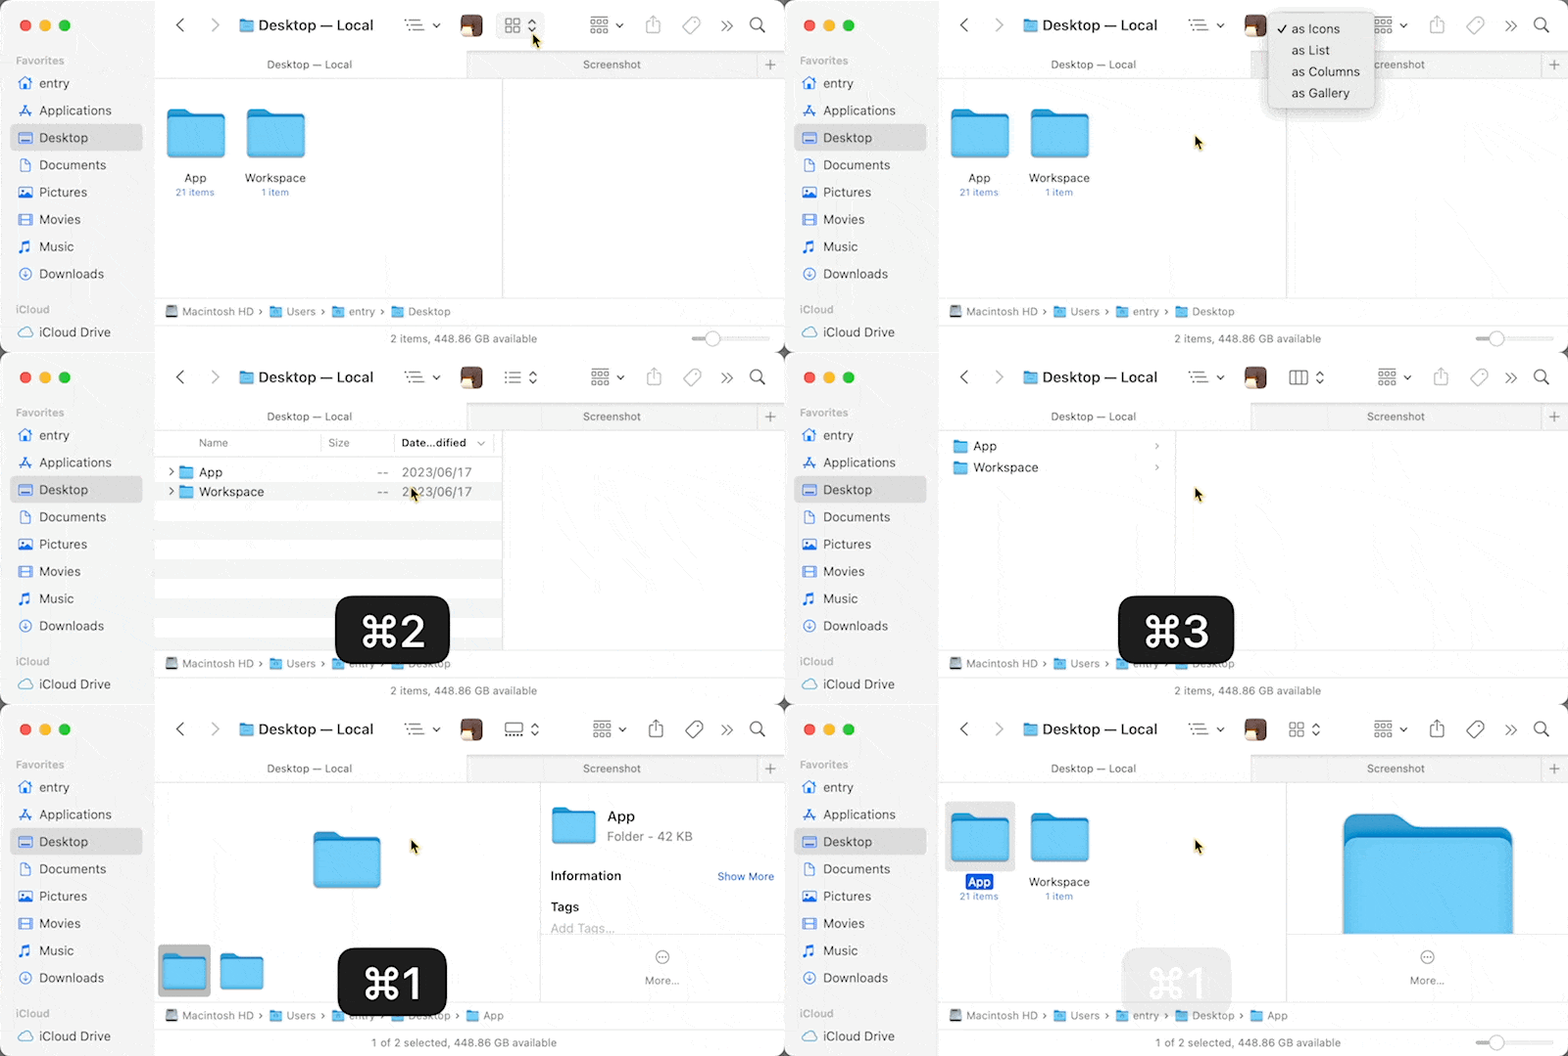
To switch Finder to column view, you can either click Finder > View > “As Columns” or press Command + 3. Column view offers advantages compared to icon or list view as it allows for intuitive understanding of the relative position of files and folders.
It also enables quick navigation between folders using only the keyboard arrow keys. Pressing the left or right arrow keys allows you to move between parent and child folders, while the up or down arrow keys can be used to select previous or next items in the list.
7. Jump to Your Desired Folder in an Instant
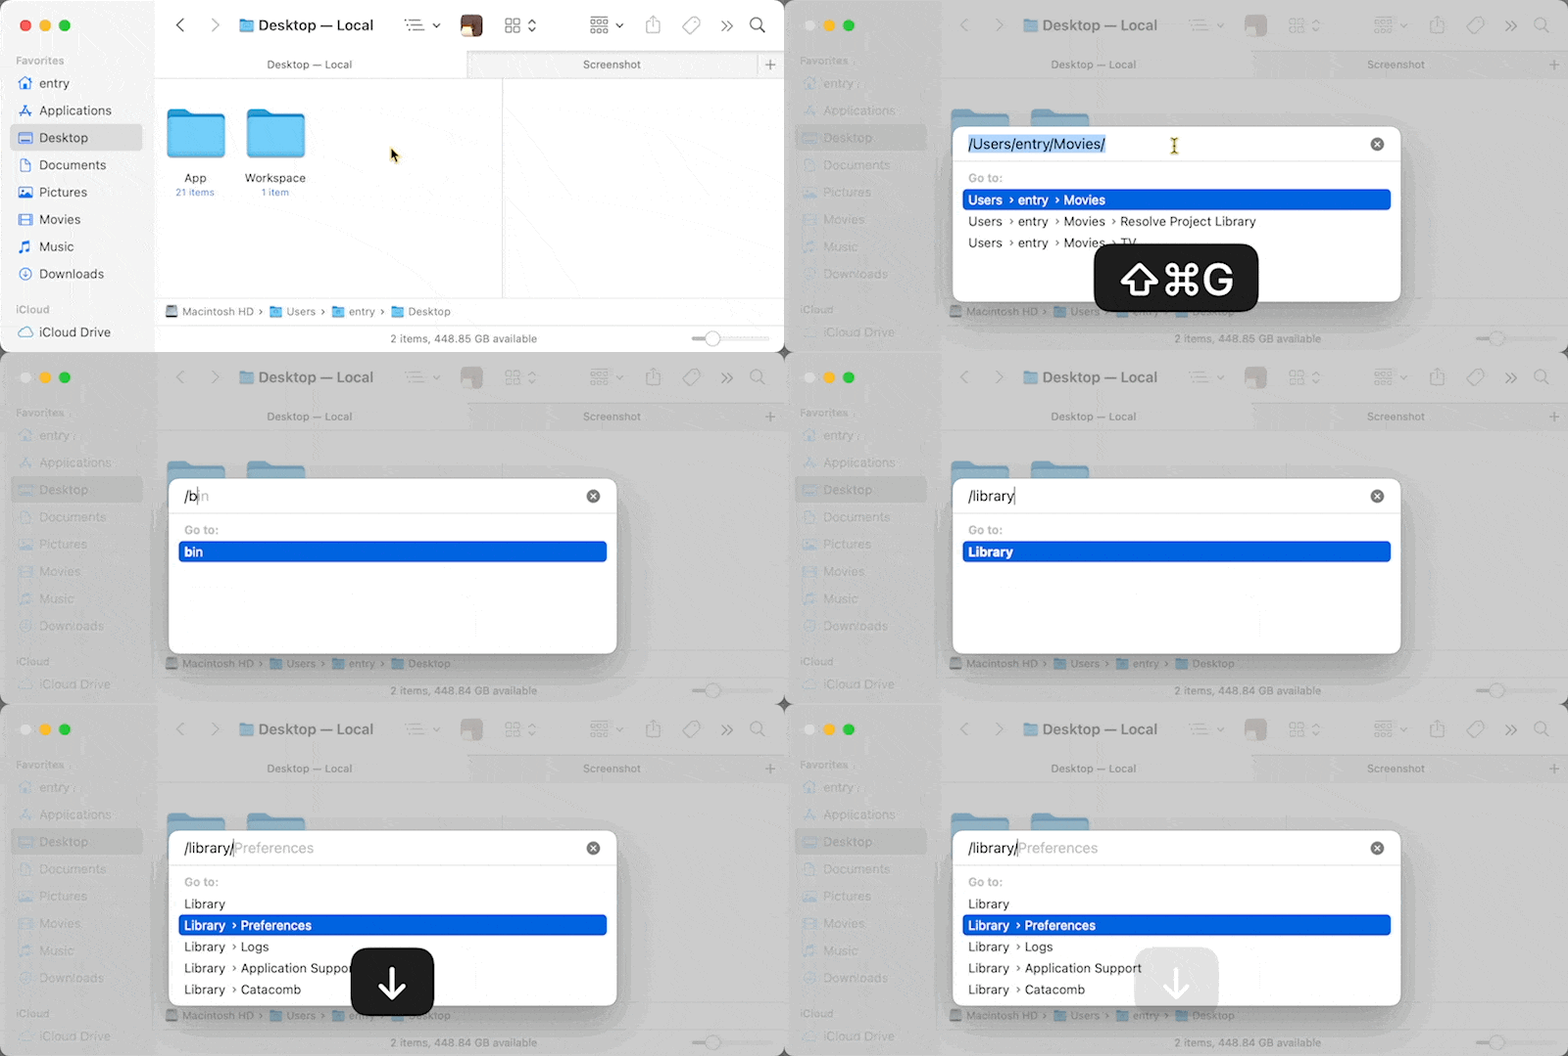
Want to quickly navigate to a specific folder without getting lost? Try using the “Go to Folder” feature. Click on the Finder menu, then select Go > “Go to Folder,” or press Command + Shift + G to bring up a panel where you can enter the path to the desired folder.
Simply enter the folder’s path name (e.g., /Library/Fonts/ or ~/Pictures/), and it’s even more convenient to use the autocomplete feature. Type a partial path and press the Tab key, and it will automatically find the remaining path for you (e.g., ~/Libr ▶ Tab key ▶ /Library).
Additionally, you can use a tilde symbol () to represent your user’s home folder path. For example, if you want to open the Downloads folder, you can simply enter ~/Downloads instead of the full path (/Users/hongkildong/Downloads).